You do not have to be logged in to donate.
If you want to use the website often please enrol (quick and free) at top right.
Uploading pictures to the MountainViews service.
|
You're welcome to upload pictures with comments and walking guides. It should only take a few minutes to upload a picture.
In summary they need to be jpegs and will be sized within 600X600 pixels
or up to 800 wide for panoramic pictures. Here's the full story .. |
|||||
|
The usual way to get pictures these days is from a digital camera, or sometimes a mobile phone. You can also get pictures from older negatives or slides using a scanner.
Whatever the source, the picture should be available on the PC (including Macs, Linux boxes) that you connect to the internet with. Currently Mountain Views can accept JPEG format pictures. Often pictures in this format are named as "apicture.jpg"
or "Pic100-001.jpg", though not always. If your picture is not in JPEG format you will need to convert it to JPEG format
which can be done by editing tools such as Paint, Paintshop Pro or Photoshop. |
||||
| Size of picture. |
Mountain Views stores and displays pictures as follows
Final Maximum height: 600 pixels For example the following sizes are allowed Your options therefore are
|
||||
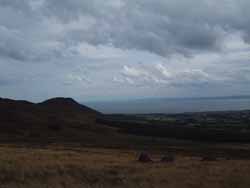
Uploading the picture.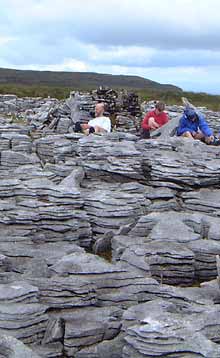 A break on the Ben Bulbin walk 2002 amongst the curious limestone formations. |
Put in a comment - use it to tell us something interesting about the picture. It's often valuable to identify peaks or other larger features that are visible.
|
||||


| Additional information, including the Guide to Making Pictures Boring. | |
| Errors and Problems. |
If the website cannot handle the picture file you are trying to upload it will issue a diagnostic message to help
you correct the problem. For example if you try to upload a file that is not a picture or is a picture of the
wrong format (say, a .BMP) then the website will issue a warning. There will also be warnings if the file is too
large, too small or has an incorrect extension (must end with ".jpg" or ".jpeg").If you have tried to get it to work and it still fails then please contact the MountainViews administrator at admin -at- mountainviews.ie If you have uploaded a picture and for some reason find that a change is needed (for example if the wrong
picture was uploaded for a given mountain) feel free to contact the MountainViews administrator at admin -at- mountainviews.ie |
| Quality of pictures |
MountainViews would like to see pictures of as many mountains as possible in Ireland but lets try to make the
pictures interesting and informative. |
| Guide to Making Pictures Boring ... |
Wait for a day that is totally
overcast, or if there is sun wait until the sun is at its highest in the sky. Take a picture a long way away from
the mountain, arrange the exposure so the ground is too dark and the sky is too bright (pointing towards the sun
helps this), ensure that there is nothing of interest in the foreground or middleground, try to get mist covering the summits, ensure that there are some powerlines or roads clearly visible and near and include some of your out
of focus friends in fluorescent jackets leering at the camera from nearby. Zzzzzzzzzz |
| No guarantees, but the following will help a picture be more interesting � |
Mountain View pictures are necessarily small so dramatic slopes, interesting shadows, strong contrasting silhouette or colours will all help. Or a strong story. Bright sun or very slight overcast light will bring out the colour, texture and shape of the land. Unless there is no choice, don't take pictures without strong light. Evening or morning sun angles bring out the shape of the mountains. Circumstances such as light snow covering or a view of mountains peeking above clouds can make a picture great. Posed pictures generally don't work, but pictures with people doing something can be great. Cropping a picture to concentrate attention on the interesting parts of a view often transforms a picture. Learn how to get the exposure for the main area of the picture correct. Remember an area of sky in Ireland is usually 10 times as bright as the same area of ground. Camera exposure meters will often react to this by underexposing for the ground so it comes out dark with little discernible detail. Learn how to avoid this for your camera with whatever you have. If you can afford it get a camera which supports filters. The two most useful filters with a digital camera are "Graduated Neutral Gray" and "Polarising Filter" - both help to control contrast. All the other basics of camera work are needed. Don't shake the camera, don't point it into the sun, make sure it focuses on what you are interested in. Flash is rarely appropriate on hills. Realise that at least 95% of your pictures are rubbish and you won't look at them again more than once leave aside anyone else. Make it easy to take pictures as you are out walking. Opportunism is everything in mountain photography, where the light can change in seconds. 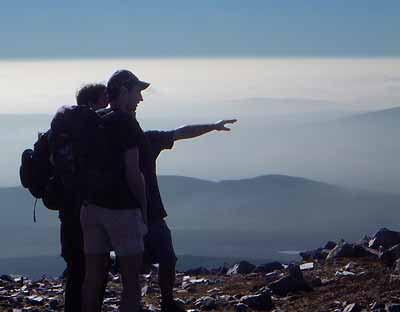 Walkers on Muckish see their route to Errigal - the Glover Walk 2002. |